Configure Dialogflow CX using Google
The following procedure describes how to create a Dialogflow CX bot connection in Live Hub using Google Dialogflow web site:
-
Click Go to Dialogflow; you are navigated away from the Live Hub wizard to Google's website for special additional settings. As soon as you complete these settings, you are automatically returned to continue the wizard; the configuration process in Dialogflow begins:
-
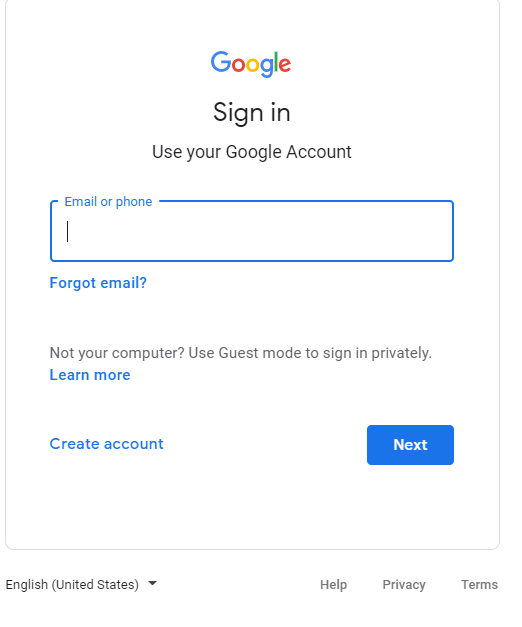
Go to https://dialogflow.cloud.google.com/cx; the Google Sign in page appears.
-
Sign in with your Google account details, and then click Next.
-
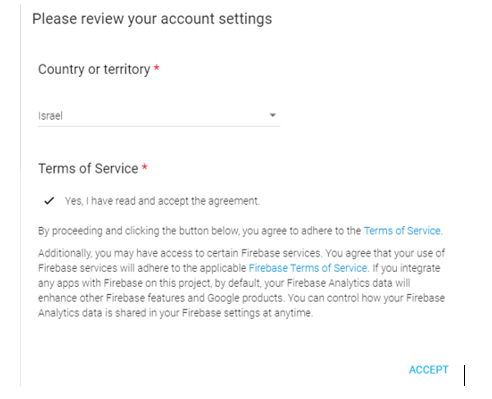
Review and accept your account settings.
-
On the Welcome to Dialogflow CX page, click Get started.
-
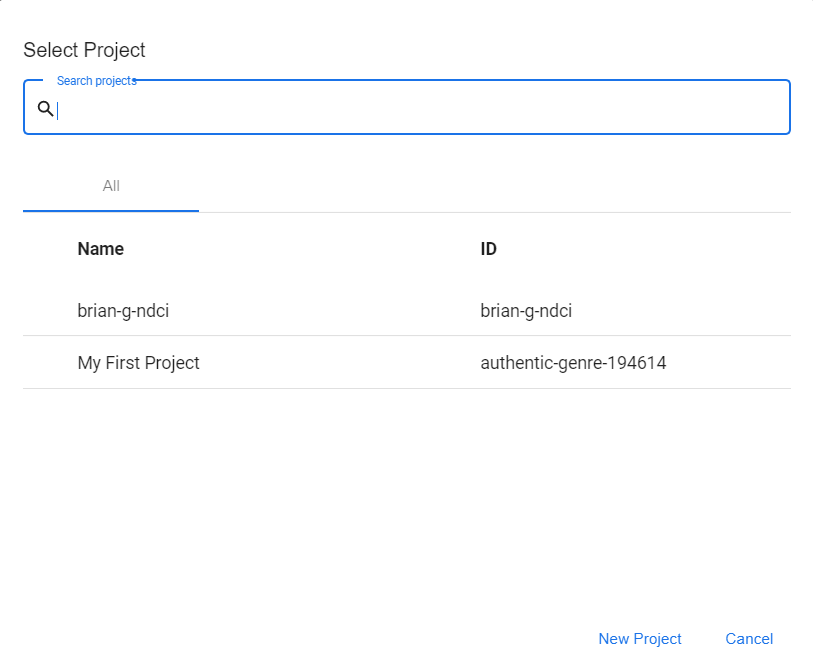
Select your project.
-
Select your project; the following appears:

-
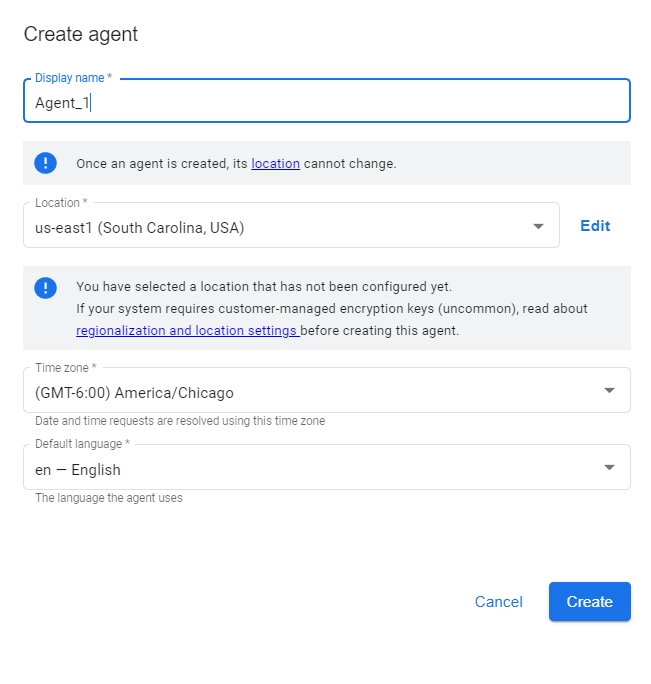
Click Create agent; the following appears.
-
Add a name to your agent, and then click Create; the following appears.
The 'Agent name' field can only contain alphanumeric characters. You cannot use spaces or special characters.
-
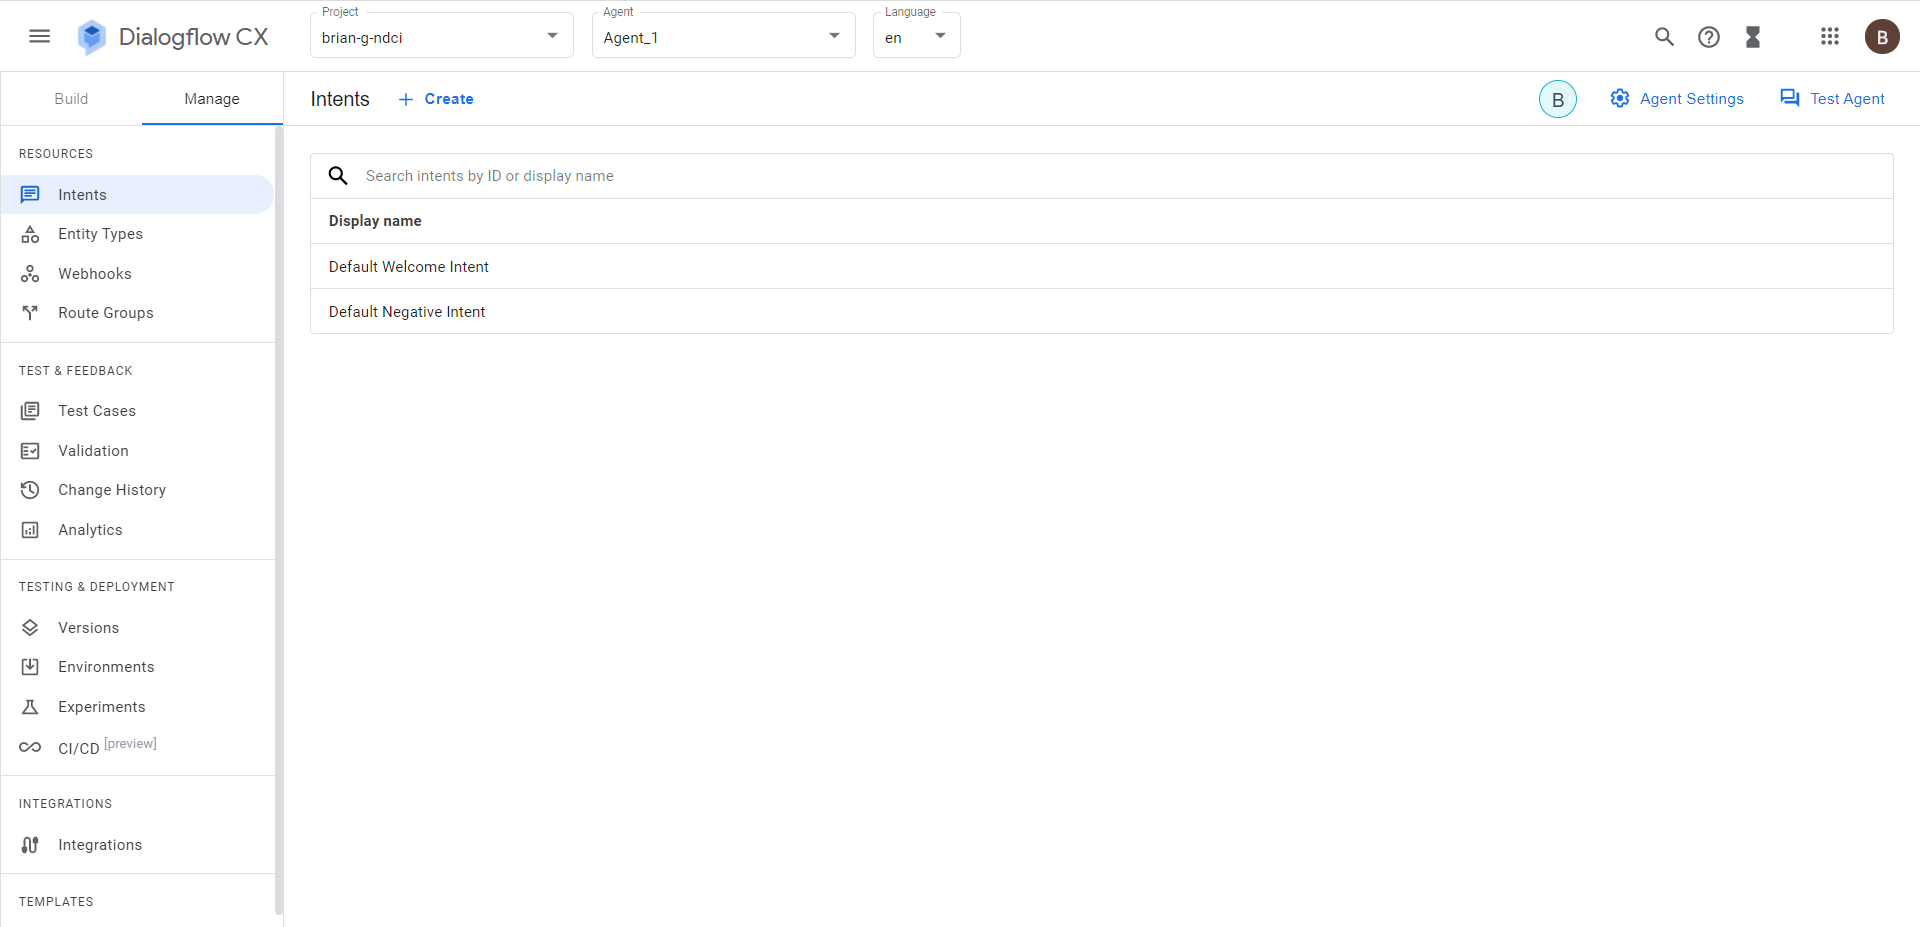
Click Manage; the following appears:
-
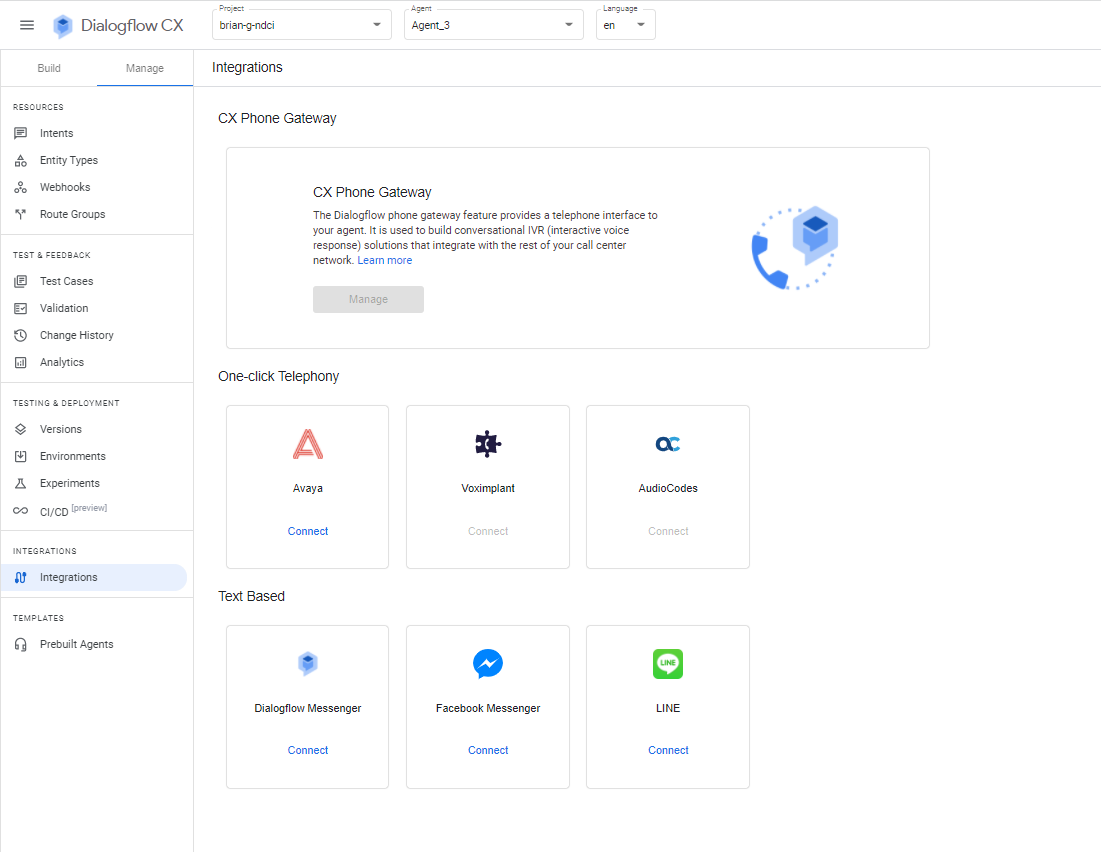
Click Integrations; the following appears:
-
Click the AudioCodes icon.
-
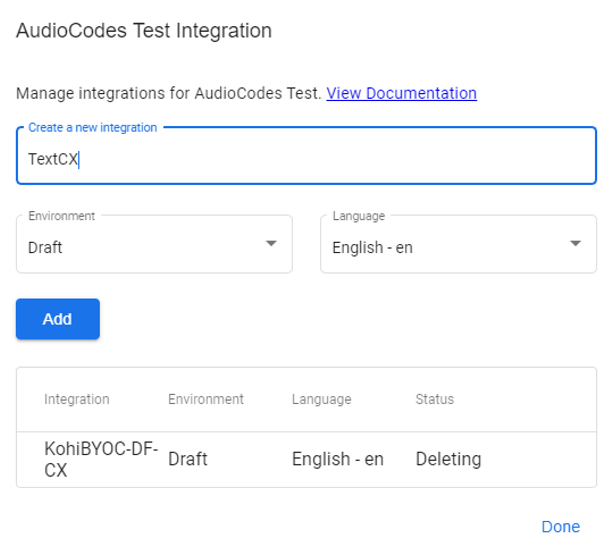
In the 'Create a new integration' field, add an integration name, and then click Add. You will now be re-directed to the Live Hub log in screen to connect with your bot via the AudioCodes Live Hub.
-
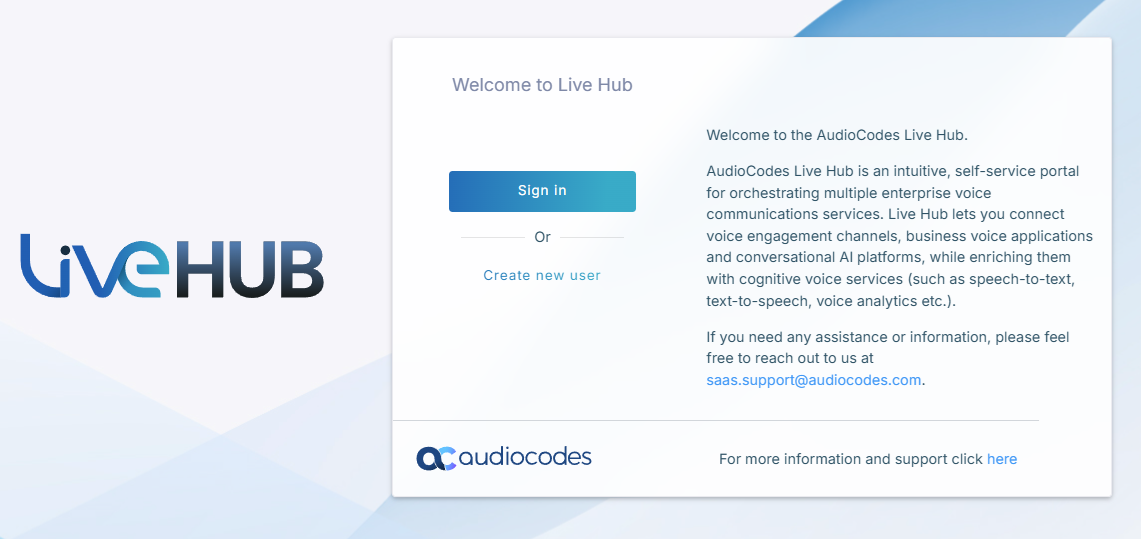
Sign in again to Live Hub;
-
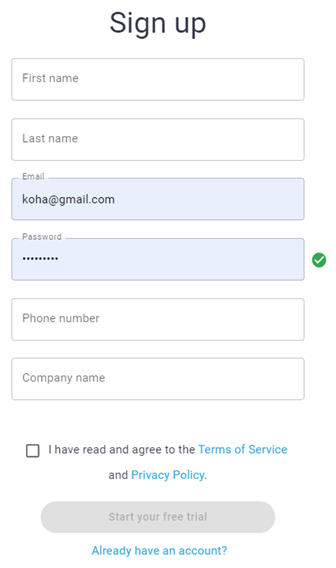
In the 'Name' field, enter the new integration name, and then click SIGN UP; the following appears:
-
Click Start your free trial; or if you already have an account, enter your credentials, and then click Sign in:
-
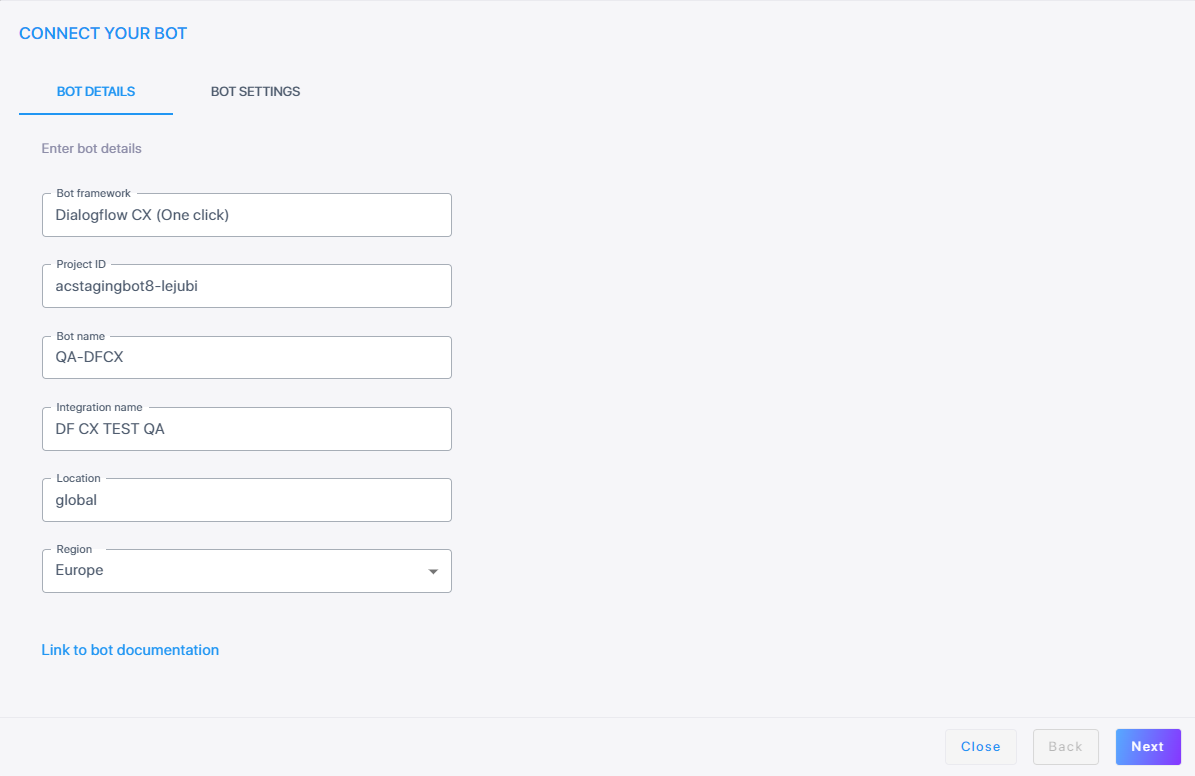
On the Bot Details page, enter the relevant details, and then click Next.
-
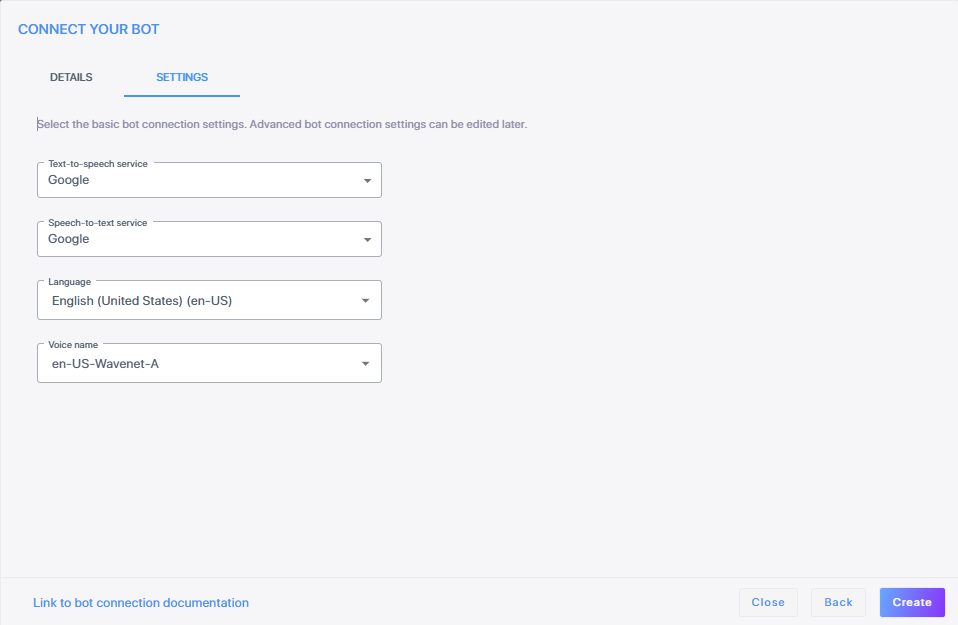
On the Bot Settings page, enter the relevant details, and then click Create.
'Text-to-speech service' and 'Speech-to-text service' can be configured only with Google.
-
Click Create; the new bot connection is created.
The new bot connection card is created with the 'Integration' value of One click.
-